
Basics of editing
How to open a GIF/WebP/MP4 or video file and make a new GIF/WebP or video file
How to create GIF/WebP/MP4 from images
How to cut frames in GIF/WebP/MP4
How to change the color of GIF/WebP/MP4
How to save each frame as an image file(PNG/JPG)
How to apply effects/add texts on the selected frames
Recording
How to record full screen
How to fit the recording window to another program
How to record mouse click effects
Make file size smaller
How to make GIF/WebP file size smaller
How to remove duplicate frames in animated GIF/WebP/MP4
Conversion
How to convert GIF/WebP to video(MP4/WebM)
How to create LINE stickers (Converting GIF to APNG)
How to create APNG from multiple PNG images
How to make a video(WebM) with a transparent background
Texts, Speech bubbles, Stickers, Images
How to add text to animated GIFs
How to apply animation effects to objects in GIFs
How to censor an animated GIF(add a mosaic effect)
How to insert alpha channel images on animated GIF/WebP/MP4
Loop, Repeat, Speed, Resize
How to make reverse animated GIF/WebP/MP4
How to stop GIF/WebP from looping
How to change the speed of GIF/WebP/MP4
How to make seamless looping GIF/WebP/MP4
How to resize/rotate/mirror GIF/WebP/MP4
Collage, Border, Photo frame
How to Make a Video/GIF Collage
How to add a border to GIF/WebP/MP4
How to make GIF/WebP/MP4 with round corners
How to make round GIF/WebP
How to put animated GIFs in your own photo frames
How to add a border around GIF/WebP/MP4
Special features of Honeycam
How to make a summarized GIF/WebP from a short video(MP4/Youtube)
How to prevent color loss when saving as GIF
How to add zoom animation effects on animated GIFs/videos
How to save each frame as an image file(PNG/JPG)
It is so easy to save (export) each frame as an image file like PNG or JPG using Honeycam.
1. Firstly, open(simply drag and drop) a GIF/WebP/video file.
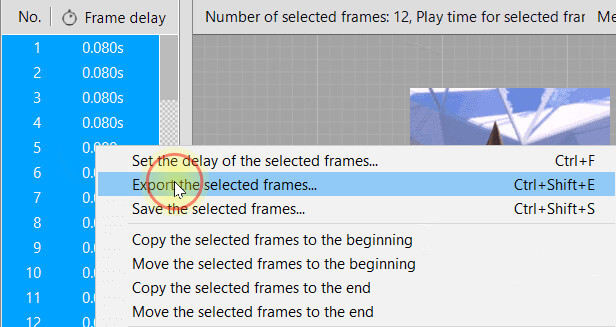
2. Select frames in the left pane.
You can select multiple frames by pressing the Ctrl key when you click frames. Press Ctrl+A key if you want to select all frames.
3. Just click the right mouse button and select [Export the selected frames...] once the selection is done.
You can also select the destination folder and the file extension(JPG/PNG) in the Save As dialog box follows.
We recommend that you save it as JPG because the output file size will usually be smaller than that of PNG format. You can, however, save it as PNG when you want to save them as 100% the same as what you're editing.